Updated January 2023. At time of writing Pandsa DataReader no longer supports Yahoo data due to an API change. This article has been updated to reflect the change.
In the early days of QuantStart we posted an article on setting up an Algorithmic Trading Research Environment with Ubuntu Linux and Python. In 2013 when the article was first written, installing Python was not a trivial task. Problems with GCC compilers, cross dependencies between libraries and operating system intricacies all played a role in making the job of installing Python much harder than it needed to be. These days the problem is largely solved. In fact there are now so many options for installing Python that it is easy to get confused.

There are many different approaches you can take to installing Python, and there are plenty of contradictory opinions on the best appraoch. With that in mind it is better to choose the method based on how you intend to use the programming language. If you plan to use Python to explore algorithmic trading then this article will show you how to get an environment up and running in the simplest way. If you are familiar with programming and installing software then you might prefer to install the Official Python Distribution. There is an excellent tutorial on for this method here.
Currently we recommend using the Anaconda Python distribution by Continuum Analytics. The main reasons for this are discussed below.
- Anaconda comes with everything you need to get started analysing your data.
To quote their website Anaconda is a Python and R distribution that aims to provide everything you need (python wise) for data science tasks. - Anaconda comes with Conda.
Conda is a package manager that allows you to install, upgrade and uninstall all your Python libraries. It can install from pre-built conda packages and it can build from source code. Conda also allows you to create and manage your virtual environments. - Anaconda works well with Jupyter Notebooks.
By using IPyKernel you can quickly and easily hook up your virtual environments to your notebooks.
When you install Ananconda you get immediate access to over 1500 Python libraries including NumPy, SciPy, Pandas, Beautiful Soup and Requests. As you will see in later tutorials you can even control the versions of these libraries by creating your own virtual environments. Some of the criticisms of Anaconda have been that it is bloated, not all of the packages are relevant and it takes up too much space. If you would prefer a more streamlined version Continuum Analytics offers Miniconda which gives you access to Python and the Conda package manager, but you will have to install all the libraries yourself. If you have limited disk space and feel this is a better option for you there is a good tutorial on installing Miniconda here.
Installing Anaconda
This post is part of a series on how to install the Anaconda Python distribution on different operating systems. In this post we will discuss how to install Anaconda3 version 2021.11 (Python 3.9), on Linux using Ubuntu. Other posts in the series concentrate on installation with:
Installing Anaconda on Linux-Ubuntu
Most readers who have opted for a linux based operating system will likely have enough prior experience to want to interact with Python without the need for the Anaconda wrapper. In fact Ubuntu 21.04 comes with Python 3 already installed. To check the version of Python you are currently running simply open a terminal and type python3 --version. If Python 3 has already been installed and you are comfortable interacting with Python in this way you may wish to skip ahead to Creating a Virtual Environment. If you are new to Linux or would rather have Anaconda on your system then you can follow along from here.
Open up your web browser and head to the following address: https://www.anaconda.com/products/individual The website may not determine the correct download for your system. As you can see in our case it selected Windows, click on the correct installer to proceed.
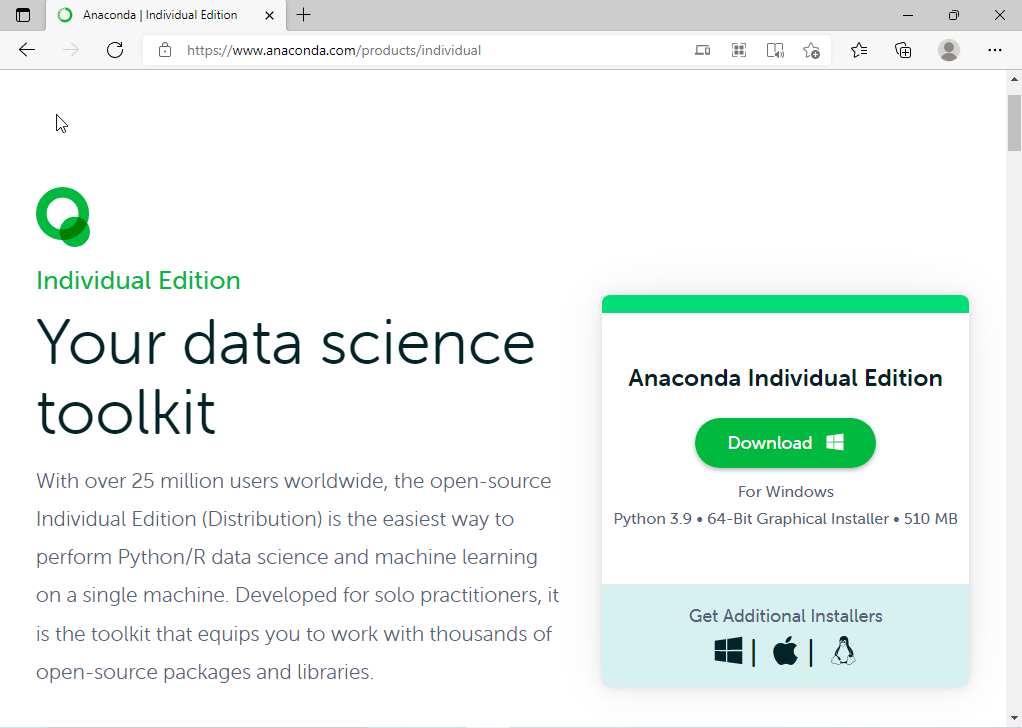
Click the green download button. Your download should begin immediately. Once the download is complete you will need to run the downloaded file in your terminal. Open the file manager and search for the Anaconda file you have just downloaded. It should be located in your Downloads folder but if you are running Firefox it may be located in a subdriectory within this folder. The location of the file is listed on the right.
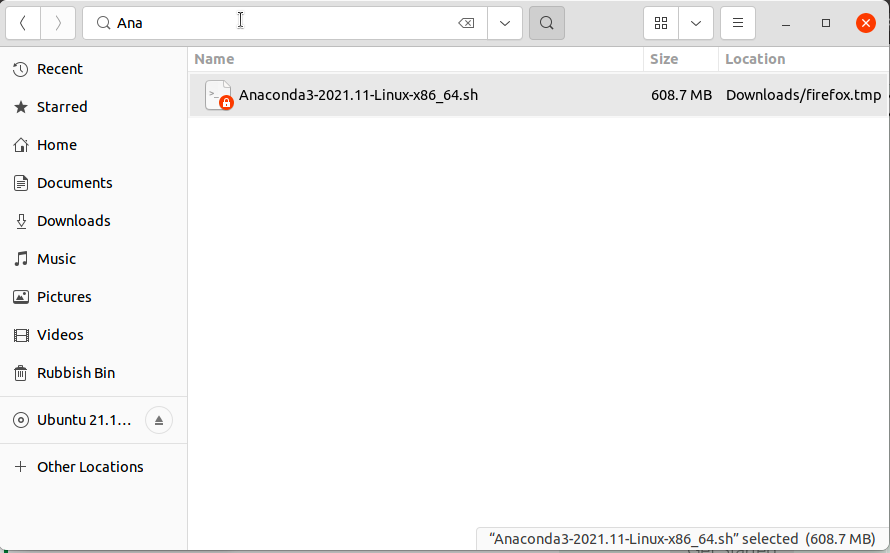
Open the terminal appplication and navigate to the location of the downloaded file by typing cd ~/Downloads/"subdirectory_if_any" be sure to supplement the name of any subdirectory. Once inside the directory you can run ls -la in the prompt to see names of the items located in that directory along with their current permissions (on the left).
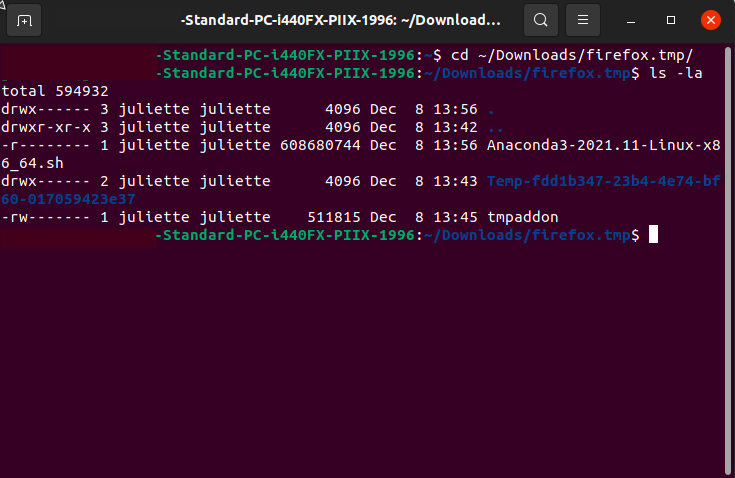
In order to install anaconda you need to run the Anaconda bash script, which has a .sh file extension. However in most cases the file is not downloaded with execution permissions. The first column on the row containing the file name contains -r-------- You need to change the permissions before you can run the file. To do this simply type chmod 777 name_of_your_downloaded_file. Remember to supplement in the name of the downloaded file.
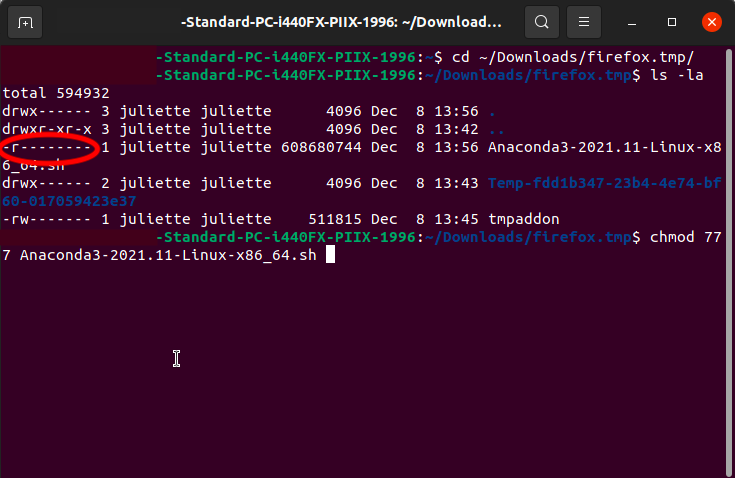
If you run ls -la again you will see that the permissions for the file have now been updated to -rwxrwxrwx. You can now run the file by typing ./name_of_your_downloaded_file remember to supplement in the name of the file.
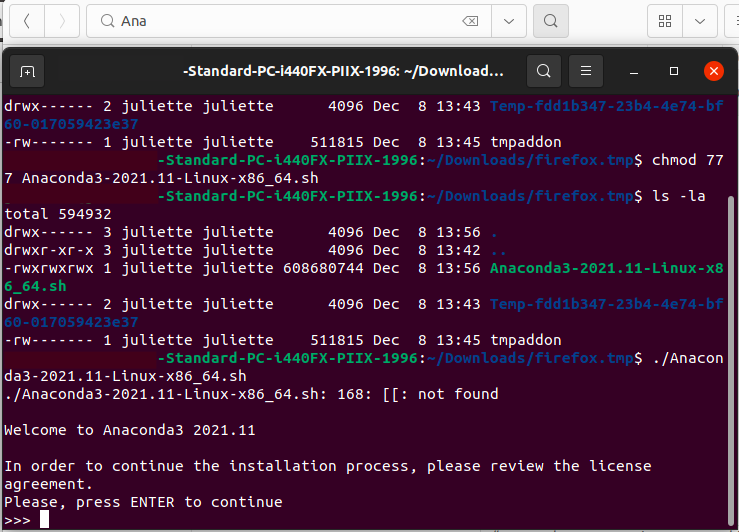
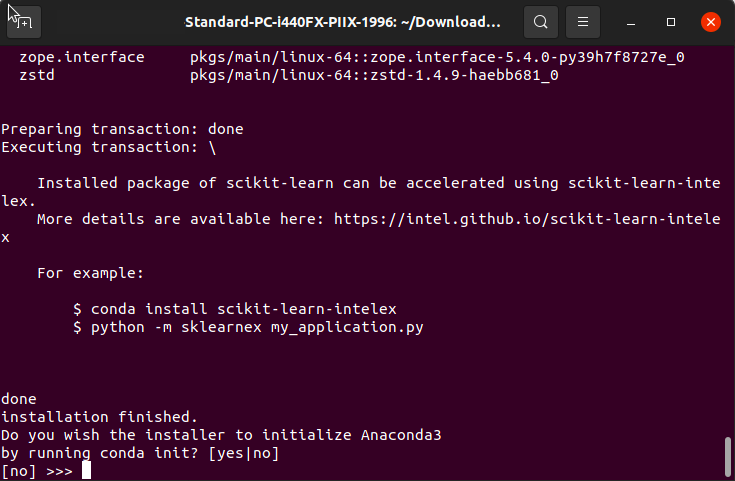
After pressing enter you will see the license terms printed to the terminal. You can press space to get to the bottom were you will need to accept the terms to continue with the installation. You will then be asked to confirm the installation location, we recommed leaving this as the default. After pressing enter the installation will begin. Once complete you will be asked if you wish to initialize Anaconda. Type yes.
Following initialisation Anaconda will now be your default Python environment. This means that on startup of the command shell prompt (or terminal) Anaconda will be activated by default. In order to deactivate this at any time use the command conda config --set_auto_activate_base false. To reactivate use conda config --set_auto_activate_base true. You now need to close and re-open your terminal.
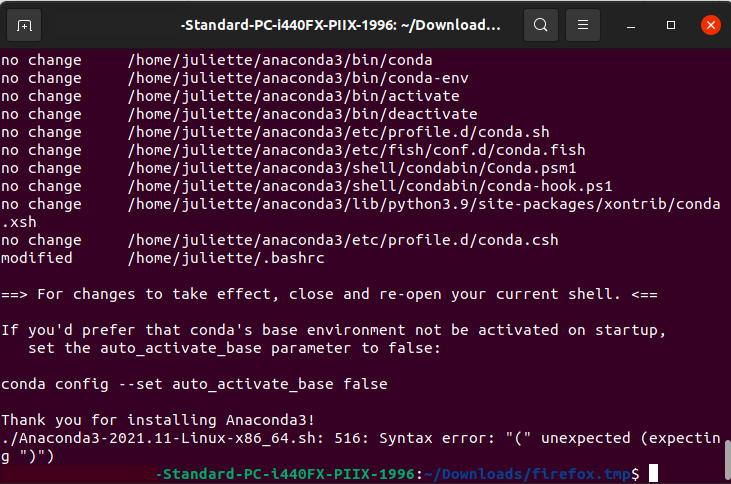
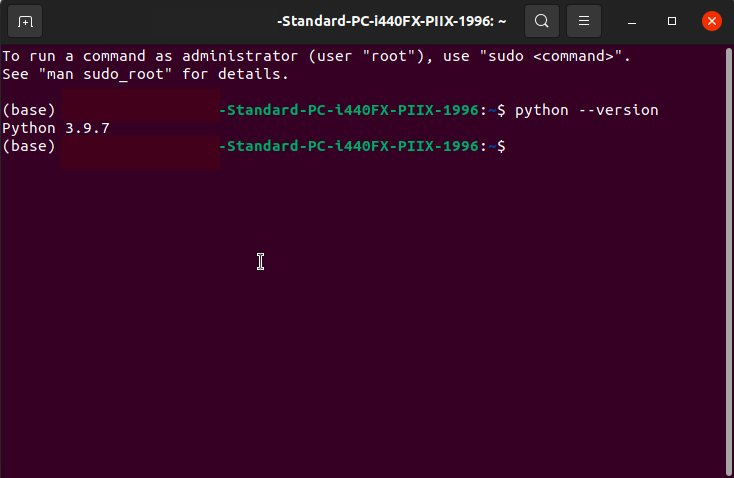
You can now see the (base) appear at the left hand side of the prompt indicating that you are in Anaconda's base environment.

Creating your first virtual environment
Once you have been using Python for a while or across multiple different projects you will quickly run into the issue of dependencies. A script you have written or a project you are working on may require you to use features that are available in the latest version of a Python library like Pandas, but you have other projects or scripts that use older versions. How do you manage and maintain your Python environment to allow you to run and work on both scripts or projects? The answer is to use a virtual environment.
A virtual environment is an isolated Python environment that has its own dependencies, or in other words, its own versions of libraries and packages. Virtual environments can be created for each of your projects so that you can use whatever versions of libraries are necessary for each one. With Anaconda you can also specify versions of Python when you create them.
One of the benefits of Anaconda is that it comes with the package manager Conda, which allows you to create virtual environments easily. Anaconda currently allows you to create virtual environments for Python 2.7, 3.5, 3.6, 3.7, 3.8 and 3.9. Most package versions can be found using conda or conda-forge or, as a last resort you can use the python package manager pip. If you have used pip to install your libraries within your conda environments they will be installed into a different channel and you will not be able to uprade them using the command conda upgrade. If you prefer not to use anaconda as your Python distribution and have installed Python directly from the Official Python Distribution, this same task can be accomplished using pyenv to obtain multiple version of Python and pipenv or virtualenv to manage virtual environments. A good tutorial on this can be found here.
Now that you are in the Anaocnda base environment you have access to all the packages that were downloaded and installed by Anaconda and if you type python --version into the prompt you will see that you are running the default version of Python in this case Python 3.9.7.
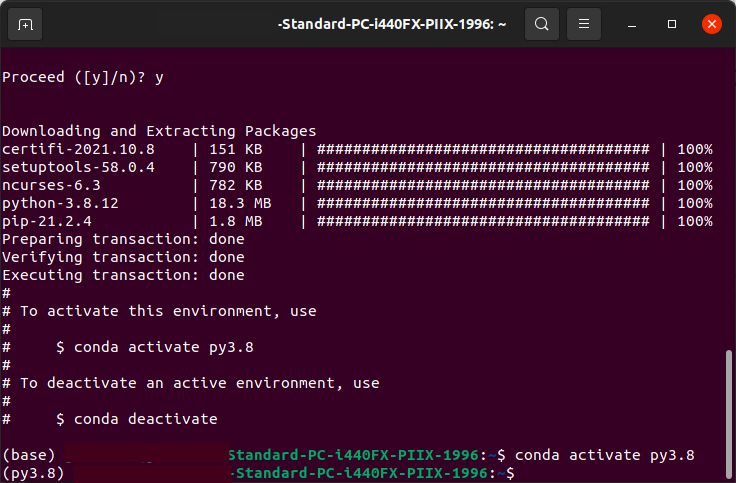
We'll now create a virtual environment with Python 3.8 and install some basic packages to display 5 years of apple data with only a few lines of code. Let's create the environment first. In the terminal enter the following line
conda create -n py3.8 python=3.8
The first part "conda create -n" uses the package manager conda to create a new environment. The second part "py3.8" is the name of the environment, this can be anything you want. If you forget the name of your environments you can use conda env list at anytime in the terminal to display a list of all the environments you have created. The final part "python=3.8" specifies that we want Python 3.8 to be our Python version for this environment. The prompt will then provide you with a list of what will be installed and downloaded into your environment and ask you if you are happy to proceed. Once complete you type the following to activate the environment.
conda activate py3.8
You will notice that the prefix in brackets has changed to display (py3.8) We can now begin to add our dependencies.
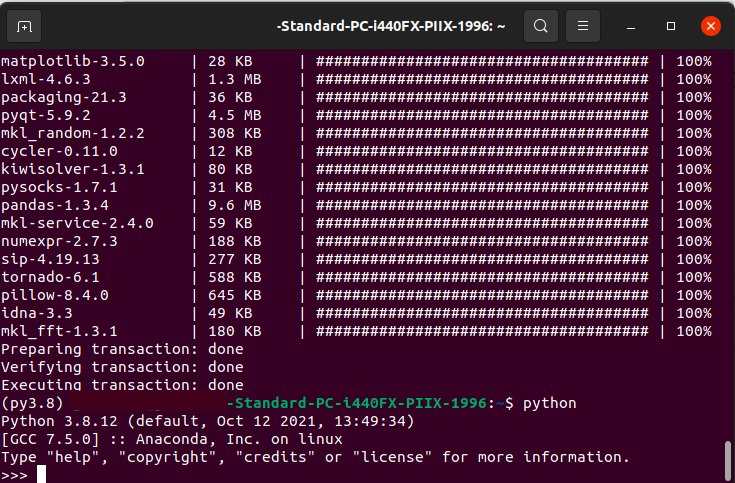
In order to view our stock data we need to install only three libraries: Pandas to analyse and plot our data and Pandas-datareader to obtain our data and finally Matplotlib which will allow us to plot our data using the Pandas plotting interface. In the terminal type the following:
conda install pandas pandas-datareader matplotlib
Type python into the terminal to open a Python console. You should see some header lines containing information about the version of Python that is running and the prompt will be replaced by three chevrons. You are now inside a Python terminal and can start coding in Python. You can return to the bash shell at anytime by typing exit() into the terminal.
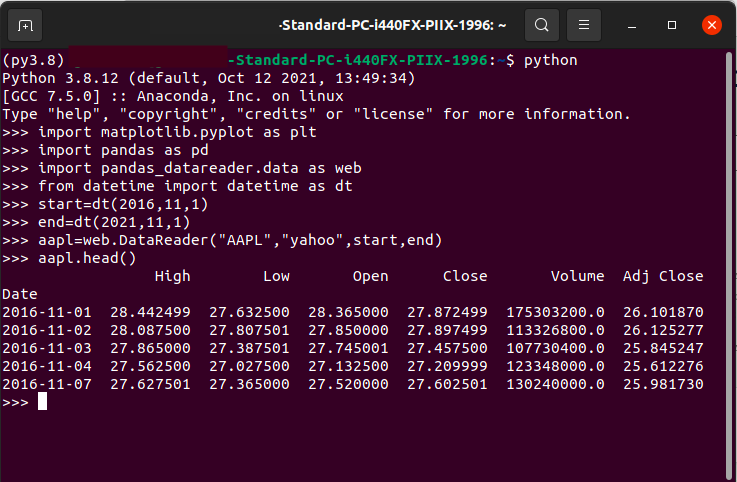
We will begin by importing our libraries into our namespace to obtain and analyse our data.
import matplotlib.pyplot as plt
import pandas as pd
import pandas_datareader.data as web
This takes care of the libraries we need to import. Now we can begin to obtain our data. We can use Pandsa DataReader to obtain 5 years of stock data and place it directly into a DataFrame object. The following command will get OHLCV Apple data from Stooq.com. Pandas-Datareader allows you to download data from multiple sources including Quandl, AlphaVantage and IEX. A full list of data sources can be found here.
aapl = web.DataReader("AAPL", "stooq")
We now have five years of Apple data stored as a DataFrame. We can display the first fews rows using the Pandas command aapl.head().
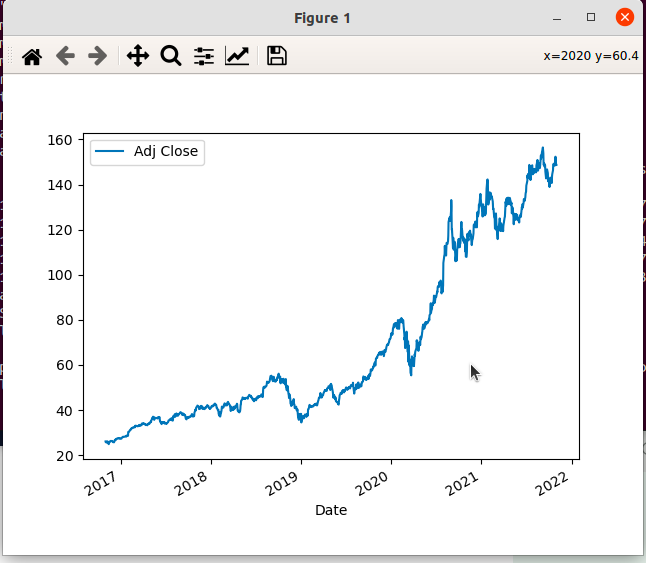
Plotting our data is simple using Pandas, just type the following lines:
  >>>aapl.plot(y="Adj Close")
  >>>plt.show()
Notice that the last line of code uses plt.show(). This command is making use of the Matplotlib.pyplot library that we imported at the start. It allows us to display the graph directly. The graph of Apple adjusted close price will open in a new window.
And that's it! Using Pandas and Pandas-Datareader you can import multiple stocks, from different data providers. You can perform simple tasks from plotting the close price to building complex strategies all using just three open source Python libraries. The only issue with this approach is that once you exit the Python console you will lose all your work. You can exit the Python console by typing exit() and then deactivate your virtual enviroment by typing conda deactivate.
In the next article we will be looking at how to use Jupyter Notebooks to build candlestick plots and moving averages.There is a great conda cheat sheet available here, it's a really useful reference in case you need to quickly check a command.


