Despite writing a couple of articles on how to install a Python algorithmic trading research environment on Ubuntu, I still receive a lot of email regarding how to translate the instructions into Windows and Mac. It turns out that a substantial number of you emailed and commented on the site about an alternative, known as a Python distribution.
A Python distribution is a much easier way to install all of the corresponding Python libraries that are used for algorithmic trading. In essence you download a single installation package, which comes provided with all of the major scientific Python libraries such as IPython, NumPy, SciPy, scikit-learn, pandas and matplotlib as well as an Integrated Development Environment (IDE) that lets you code using a Graphical User Interface (GUI). This is a different approach when compared to my previous suggestion of installing the libraries manually and working directly with IPython and Python scripts.
Two of the major Python distributions are Enthought's Canopy and Continuum Analytics' Anaconda. Unfortunately, I hadn't heard of the latter when I first wrote the previous two guides on installing Python in Ubuntu. I've now tried the installation of Anaconda (which is free!) and have found it to be an easy multi-platform method for getting started in Python.
This article will discuss how to install Anaconda on Mac OSX. However, it is pretty straightforward to change it for Windows or Ubuntu, since Continuum Analytics provide easy installers for each. Once installed, I'll also describe how to run basic Python code using the accompanying Spyder IDE.
Anaconda Installation
The first task is to visit the Continuum Analytics site. You will see the following page:

Continuum Analytics home page
Click the Download Anaconda button and you'll be presented with the usual Mac OSX file save option. Save the file in the normal way. Note that the file (as of the writing of this article) is approximately 250Mb:

Anaconda package download
When the file has downloaded, make sure to open it and you'll see the following installation window:

Anaconda initial installation
Accept all of the Terms & Conditions and then proceed with the installation. You'll notice that Anaconda takes up a reasonable amount of hard disk space (0.75Gb), but this is because it comes with a lot of Python libraries pre-installed. Once the installation is finished, you'll see the following screen:

Anaconda installation finalised
The installation procedure places a shortcut icon on your Mac OSX desktop:

Anaconda desktop shortcut
If you click this icon Anaconda will load and present you with the following screen:

Anaconda launcher window
However, I had trouble attempting to load Spyder at this stage! Hence, I dug out a workaround that allows you to use Spyder directly. Use the Spotlight option in Mac OSX (the magnifying glass in the top right corner) and type "Terminal" in the dialog box. The first hit should be a black Terminal icon. Click this and you'll be presented with a prompt window. I've changed the colours on mine to be black with white text, but yours may be white with black text:
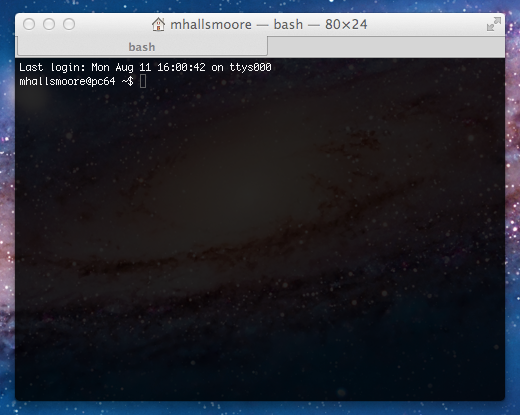
Terminal window in Mac OSX
First we need to check that Anaconda has become the default Python installation. To check this, type the following:
which python
This is the output I received, which shows that Anaconda is the current default Python installation:
/Users/mhallsmoore/anaconda/bin/python
Now you can simply type the following to launch the Spyder IDE:
spyder
You will now see the following screen, which is the Spyder IDE:

Spyder IDE
On the left hand pane you have a file editor, while the right hand pane contains an Object Inspector, a Variable Explorer and a File Explorer, which all allow you to see different aspects of your Python code. On the bottom right hand side is an IPython console, which allows you to carry out interactive Python programming.
To check that NumPy is installed correctly (a basic sanity check), we can type the following:
import numpy as np
np.mean([1,2,3])
If all goes to plan, you should see the following output:

Sypder IPython conole output
And that's it for installing Anaconda and Spyder on Mac OSX! This is a simpler procedure (on Mac!) than the previous Ubuntu installation I mentioned before in this article. In the future I'll be discussing how to do the same for Windows and Linux, which will make your quantitative finance programs truly cross-platform.


