This Article has been superseded by our new series on Installing an Algorithmic Trading Research Environment
In this article I want to discuss how to set up a robust, efficient and interactive development environment for algorithmic trading strategy research making use of Ubuntu Desktop Linux and the Python programming language. We will utilise this environment for nearly all subsequent algorithmic trading articles.
I've also put together a video on YouTube explaining the whole process, so if you prefer a visual medium, then you might want to take a look:
To create the research environment we will install the following software tools, all of which are open-source and free to download:
- Oracle VirtualBox - For virtualisation of the operating system
- Ubuntu Desktop Linux - As our virtual operating system
- Python - The core programming environment
- NumPy/SciPy - For fast, efficient array/matrix calculation
- IPython - For visual interactive development with Python
- matplotlib - For graphical visualisation of data
- pandas - For data "wrangling" and time series analysis
- scikit-learn - For machine learning and artificial intelligence algorithms
These tools (coupled with a suitable securities master database) will allow us to create a rapid interactive strategy research environment. Pandas is designed for "data wrangling" and can import and cleanse time series data very efficiently. NumPy/SciPy running underneath keeps the system extremely well optimised. IPython/matplotlib (and the qtconsole described below) allow interactive visualisation of results and rapid iteration. scikit-learn allows us to apply machine learning techniques to our strategies to further enhance performance.
Note that I've written the tutorial so that Windows or Mac OSX users who are unwilling or unable to install Ubuntu Linux directly can still follow along by using VirtualBox. VirtualBox allows us to create a "Virtual Machine" inside the host system that can emulate a guest operating system without affecting the host in any way. This allows experimentation with Ubuntu and the Python tools before committing to a full installation. For those who already have Ubuntu Desktop installed, you can skip to the section on "Installing the Python Research Environment Packages on Ubuntu".
Installing VirtualBox and Ubuntu Linux
This section of the tutorial regarding VirtualBox installation has been written for a Mac OSX system, but will easily translate to a Windows host environment. Once VirtualBox has been installed the procedure will be the same for any underlying host operating system.
Before we begin installing the software we need to go ahead and download both Ubuntu and VirtualBox.
Downloading the Ubuntu Desktop disk image
Open up your favourite web browser and navigate to the Ubuntu Desktop homepage then select Ubuntu 13.04:
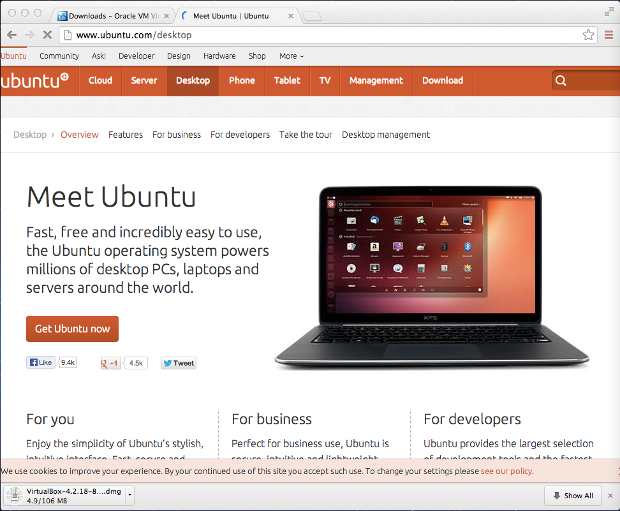
Download Ubuntu 13.04 (64-bit if appropriate)
You will be asked to contribute a donation although this is optional. Once you have reached the download page make sure to select Ubuntu 13.04. You'll need to choose whether you want the 32-bit or 64-bit version. It is likely you'll have a 64-bit system, but if you're in doubt, then choose 32-bit. On a Mac OSX system the Ubuntu Desktop ISO disk image will be stored in your Downloads directory. We will make use of it later once we have installed VirtualBox.
Downloading and Installing VirtualBox
Now that we've downloaded Ubuntu we need to go and obtain the latest version of Oracle's VirtualBox software. Click here to visit the website and select the version for your particular host (for the purposes of this tutorial we need Mac OSX):

Oracle VirtualBox download page
Once the file has been downloaded we need to run it and click on the package icon (this will vary somewhat in Windows but will be a similar process):

Double-click the package icon to install VirtualBox
Once the package has opened, we follow the installation instructions, keeping the defaults as they are (unless you feel the need to change them!). Now that VirtualBox has been installed we can open it from the Applications folder (which can be found with Finder). It puts VirtualBox on the icon dock while running, so you may wish to keep it there permanently if you want to examine Ubuntu Linux more closely in the future before committing to a full install:

VirtualBox with no disk images yet
We are now going to create a new 'virtual box' (i.e. virtualised operating system) by clicking on the New icon, which looks like a cog. I've called mine "Ubuntu Desktop 13.04 Algorithmic Trading" (so you may wish to use something similarly descriptive!):
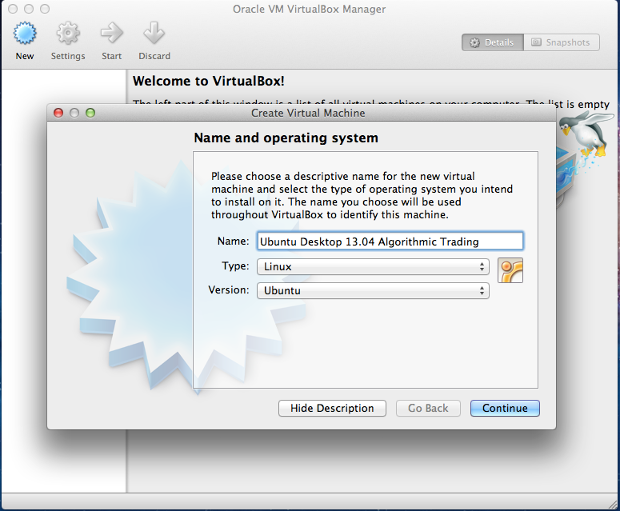
Naming our new virtual environment
Choose the amount of RAM you wish to allocate to the virtual system. I've kept it at 512Mb since this is only a "test" system. A 'real' backtesting engine would likely use a native installation (and thus allocate significantly more memory) for efficiency reasons:

Choose the amount of RAM for the virtual disk
Create a virtual hard drive and use the recommended 8Gb, with a VirtualBox Disk Image, dynamically allocated, with the same name as the VirtualBox Image above:

Choosing the type of hard disk used by the image
You will now see a complete system with listed details:

The virtual image has been created
We now need to tell VirtualBox to include a virtual 'CD drive' for the new disk image so that we can pretend to boot our new Ubuntu disk image from this CD drive. Head to the Settings section, click on the "Storage" tab and add a Disk. You will need to navigate to the Ubuntu Disk image ISO file stored in your Downloads directly (or wherever you downloaded Ubuntu to). Select it and then save the settings:

Choosing the Ubuntu Desktop ISO on first boot
Now we are ready to boot up our Ubuntu image and get it installed. Click on "Start" and then on "OK" when you see the message about Host Capture of the Mouse/Keyboard. Note that on my Mac OSX, the host capture key is the Left Cmd key (i.e. Left Apple key). You will now be presented with the Ubuntu Desktop installation screen. Click on "Install Ubuntu":

Click on Install Ubuntu to get started
Make sure to tick both boxes to install the proprietary MP3 and Wi-Fi drivers:

Install the proprietary drivers for MP3 and Wi-Fi
You will now see a screen asking how you would like to store the data created for the operating system. Don't panic about the "Erase Disk and Install Ubuntu" option. It does NOT mean that it will erase your normal hard disk! It actually refers to the virtual disk it is using to run Ubuntu in, which is safe to erase (there isn't anything on there anyway, as we've just created it). Carry on with the install and you will be presented with a screen asking for your location and subsequently, your keyboard layout:

Select your geographical location
Enter in your user credentials, making sure to remember your password as you'll need it later on for installing packages:

Enter your username and password (this password is the administrator password)
Ubuntu will now install the files. It should be relatively quick as it is just copying from the hard disk to the hard disk! Eventually it will complete and the VirtualBox will restart. If it doesn't restart on its own, you can go to the menu and force a Shutdown. You will be brought back to the Ubuntu Login Screen:

The Ubuntu Desktop login screen
Login with your username and password from above and you will see your shiny new Ubuntu desktop:

The Unity interface to the Ubuntu Desktop after logging in
The last thing to do is click on the Firefox icon to test that the internet/networking functionality is correct by visiting a website (I picked QuantStart.com, funnily enough!):

The Ubuntu Desktop login screen
Now that the Ubuntu Desktop is installed we can begin installing the algorithmic trading research environment packages.
Installing the Python Research Environment Packages on Ubuntu
Click on the search button at the top-left of the screen and type "Terminal" into the box to bring up the command-line interface. Double-click the terminal icon to launch the Terminal:

The Ubuntu Desktop login screen
All subsequent commands will need to be typed into this terminal.
The first thing to do on any brand new Ubuntu Linux system is to update and upgrade the packages. The former tells Ubuntu about new packages that are available, while the latter actually performs the process of replacing older packages with newer versions. Run the following commands (you will be prompted for your passwords):
sudo apt-get -y update
sudo apt-get -y upgrade
Note that the -y prefix tells Ubuntu that you want to accept 'yes' to all yes/no questions. "sudo" is a Ubuntu/Debian Linux command that allows other commands to be executed with administrator privileges. Since we are installing our packages sitewide, we need 'root access' to the machine and thus must make use of 'sudo'.
You may get an error message here:
E: Could not get lock /var/lib/dpkg/lock - open (11: Resource temporarily unavailable)
To remedy it just run "sudo apt-get -y update" again or take a look at this site for additional commands to run in case the first does not work (http://penreturns.rc.my/2012/02/could-not-get-lock-varlibaptlistslock.html).
Once both of those updating commands have been successfully executed we now need to install Python, NumPy/SciPy, matplotlib, pandas, scikit-learn and IPython. We will start by installing the Python development packages and compilers needed to compile all of the software:
sudo apt-get install python-pip python-dev python2.7-dev build-essential liblapack-dev libblas-dev
Once the necessary packages are installed we can go ahead and install NumPy via pip, the Python package manager. Pip will download a zip file of the package and then compile it from the source code for us. Bear in mind that it will take some time to compile, probably 10-20 minutes!
sudo pip install numpy
Once NumPy has been installed we need to check that it works before proceeding. If you look in the terminal you'll see your username followed by your computer name. In my case it is mhallsmoore@algobox, which is followed by the prompt. At the prompt type python and then try importing NumPy. We will test that it works by calculating the mean average of a list:
mhallsmoore@algobox:~$ python
Python 2.7.4 (default, Sep 26 2013, 03:20:26)
[GCC 4.7.3] on linux2
Type "help", "copyright", "credits" or "license" for more information.
>>> import numpy
>>> from numpy import mean
>>> mean([1,2,3])
2.0
>>> exit()
Now that NumPy has been successfully installed we want to install the Python Scientific library known as SciPy. However it has a few package dependencies of its own including the ATLAS library and the GNU Fortran compiler:
sudo apt-get install libatlas-base-dev gfortran
We are ready to install SciPy now, with pip. This will take quite a long time (approx 20 minutes, depending upon your computer) so it might be worth going and grabbing a coffee:
sudo pip install scipy
Phew! SciPy has now been installed. Let's test it out by calculating the standard deviation of a list of integers:
mhallsmoore@algobox:~$ python
Python 2.7.4 (default, Sep 26 2013, 03:20:26)
[GCC 4.7.3] on linux2
Type "help", "copyright", "credits" or "license" for more information.
>>> import scipy
>>> from scipy import std
>>> std([1,2,3])
0.81649658092772603
>>> exit()
Next we need to install the dependency packages for matplotlib, the Python graphing library. Since matplotlib is a Python package, we cannot use pip to install the underlying libraries for working with PNGs, JPEGs and freetype fonts, so we need Ubuntu to install them for us:
sudo apt-get install libpng-dev libjpeg8-dev libfreetype6-dev
Now we can install matplotlib:
sudo pip install matplotlib
We're now going to install the data analysis and machine learning libraries pandas and scikit-learn. We don't need any additional dependencies at this stage as they're covered by NumPy and SciPy:
sudo pip install -U scikit-learn
sudo pip install pandas
We should test scikit-learn:
mhallsmoore@algobox:~$ python
Python 2.7.4 (default, Sep 26 2013, 03:20:26)
[GCC 4.7.3] on linux2
Type "help", "copyright", "credits" or "license" for more information.
>>> from sklearn import datasets
>>> iris = datasets.load_iris()
>>> iris
..
..
'petal width (cm)']}
>>>
In addition, we should also test pandas:
>>> from pandas import DataFrame
>>> pd = DataFrame()
>>> pd
Empty DataFrame
Columns: []
Index: []
>>> exit()
Finally, we want to instal IPython. This is an interactive Python interpreter that provides a significantly more streamlined workflow compared to using the standard Python console. In later tutorials I will outline the full usefulness of IPython for algorithmic trading development:
sudo pip install ipython
While IPython is sufficiently useful on its own, it can be made even more powerful by including the qtconsole, which provides the ability to inline matplotlib visualisations. However, it takes a little bit more work to get this up and running.
First, we need to install the the Qt library. For this you may need to update your packages again (I did!):
sudo apt-get update
Now we can install Qt:
sudo apt-get install libqt4-core libqt4-gui libqt4-dev
The qtconsole has a few additional packages, namely the ZMQ and Pygments libraries:
sudo apt-get install libzmq-dev
sudo pip install pyzmq
sudo pip install pygments
Finally we are ready to launch IPython with the qtconsole:
ipython qtconsole --pylab=inline
Then we can make a (rather simple!) plot by typing the following commands (I've included the IPython numbered input/outut which you do not need to type):
In [1]: x=np.array([1,2,3])

In [2]: plot(x)
Out[2]: [<matplotlib.lines.Line2D at 0x392a1d0>]
This produces the following inline chart:

IPython with qtconsole displaying an inline chart
That's it for the installation procedure. We now have an extremely robust, efficient and interactive algorithmic trading research environment at our fingertips. In subsequent articles I will be detailing how IPython, matplotlib, pandas and scikit-learn can be combined to successfully research and backtest quantitative trading strategies in a straightforward manner.